09. Style your map
L4 A08 Style Your Map
Reference Documentation
You can customize Google Maps in many ways, giving your map a unique look and feel.
You can customize a MapFragment object using the available XML attributes, as you would customize any other fragment. However, in this step you customize the look and feel of the content of the MapFragment, using methods on the GoogleMap object.
Create a style for your map
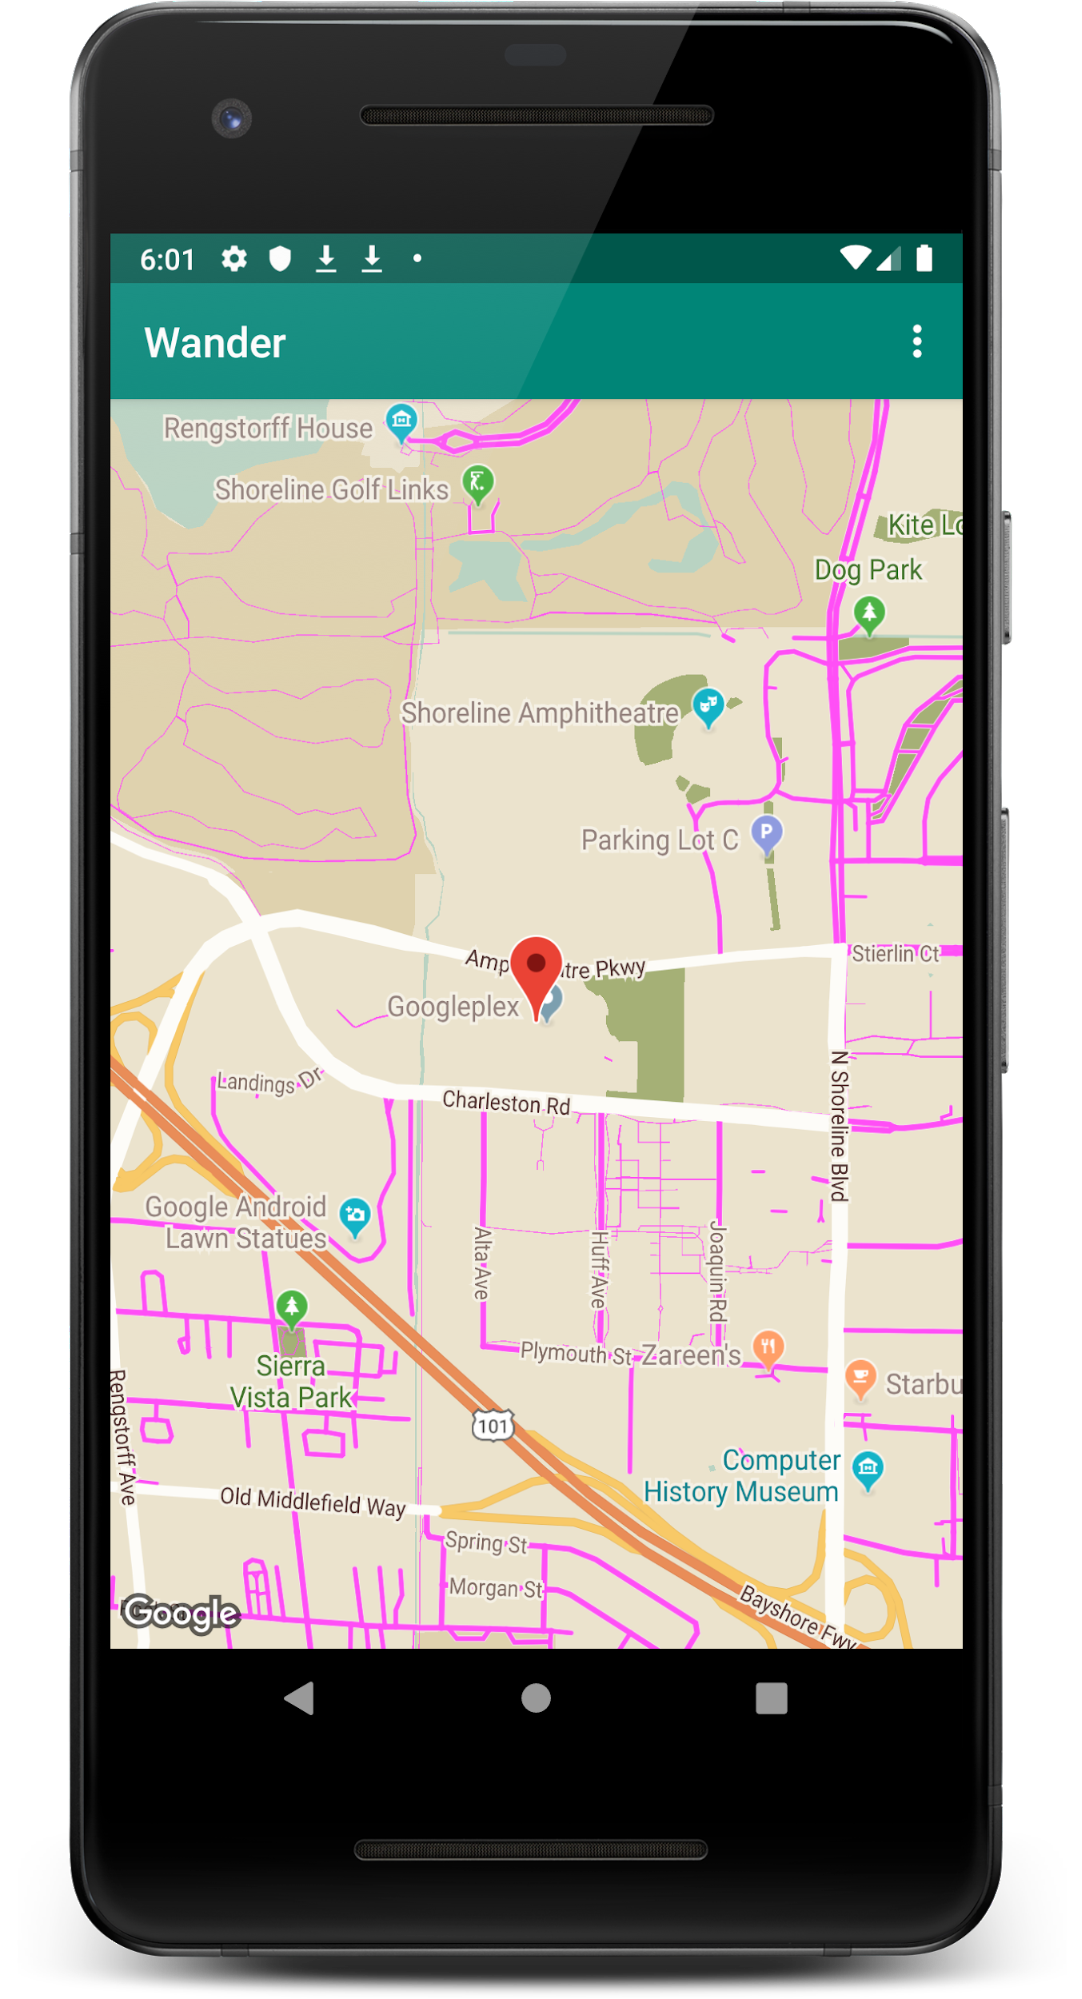
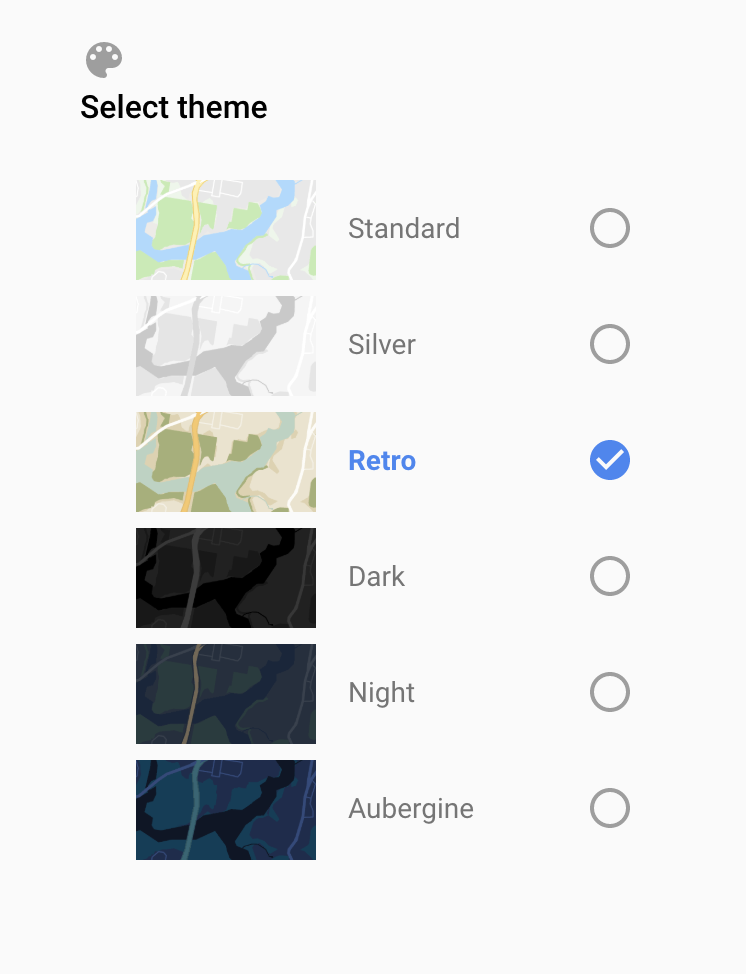
To create a customized style for your map, you generate a JSON file that specifies how features in the map are displayed. You don't have to create this JSON file manually: Google provides the Styling Wizard, which generates the JSON for you after you visually style your map. In this lesson, you style the map for "retro," meaning that the map uses vintage colors and you will be adding colored roads.
Note: Styling only applies to maps that use the normal map type.
- Navigate to https://mapstyle.withgoogle.com/ in your browser.
- Select Create a Style.
- Select the Retro theme.
- Click More Options at the bottom of the menu.
- In the Feature type list, select Road > Fill. Change the color of the roads to any color you choose (such as pink).
- Click Finish. Copy the JSON code from the resulting pop-up window.
Add the style to your map
- In Android Studio, create a resource directory in the
resdirectory and name itraw
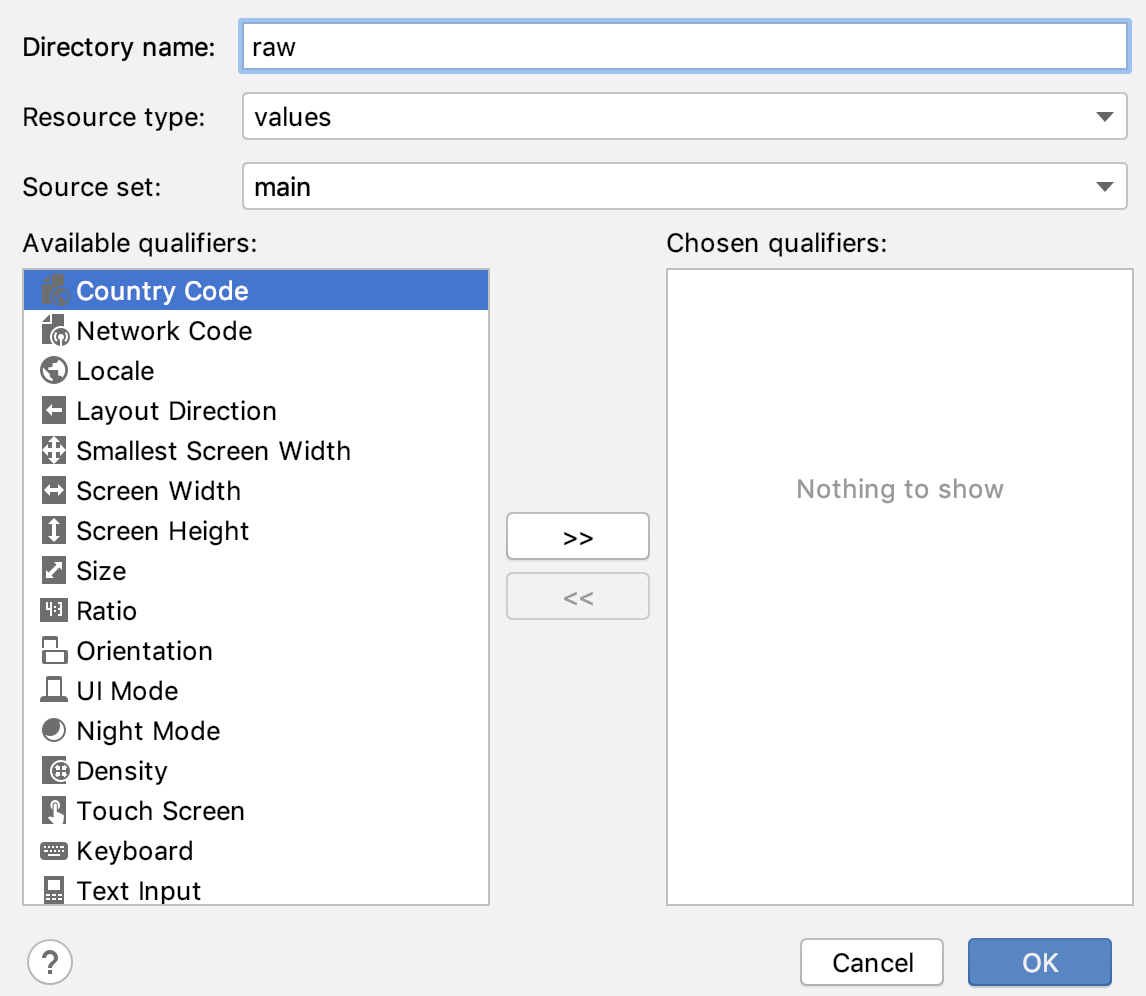
- Create a file in
res/rawcalledmap_style.json. - Paste the JSON code into the new resource file.
- Create a
TAGclass variable above theonCreate()method. This will be used for logging purposes.
private val TAG = MapsActivity::class.java.simpleName- In
MapsActivity.kt, create asetMapStyle()function that takes in aGoogleMap.
To set the JSON style to the map, callsetMapStyle()on theGoogleMapobject.
Pass in aMapStyleOptionsobject, which loads the JSON file. ThesetMapStyle()method returns a boolean indicating the success of the styling.
private fun setMapStyle(map: GoogleMap) {
   try {
       // Customize the styling of the base map using a JSON object defined
       // in a raw resource file.
       val success = map.setMapStyle(
           MapStyleOptions.loadRawResourceStyle(
               this,
               R.raw.map_style
           )
       )
   }
}- If the styling is unsuccessful, print a log that the parsing has failed.
private fun setMapStyle(map: GoogleMap) {
   try {
       …
       if (!success) {
           Log.e(TAG, "Style parsing failed.")
       }
   }
}- In the catch block if the file can't be loaded, the method throws a
Resources.NotFoundException.
private fun setMapStyle(map: GoogleMap) {
   try {
       …
   } catch (e: Resources.NotFoundException) {
       Log.e(TAG, "Can't find style. Error: ", e)
   }
}
The full method should look like this:
private fun setMapStyle(map: GoogleMap) {
   try {
       // Customize the styling of the base map using a JSON object defined
       // in a raw resource file.
       val success = map.setMapStyle(
           MapStyleOptions.loadRawResourceStyle(
               this,
               R.raw.map_style
           )
       )

       if (!success) {
           Log.e(TAG, "Style parsing failed.")
       }
   } catch (e: Resources.NotFoundException) {
       Log.e(TAG, "Can't find style. Error: ", e)
   }
}- Call the
setMapStyle()method in theonMapReady()method passing in yourGoogleMapobject.
override fun onMapReady(googleMap: GoogleMap) {
   ...
   setMapStyle(map)
}- Run your app. The new styling should be visible with retro theming and roads of your chosen color when the map is in
normalmode.
Note: If you zoom out enough, the map will not show roads anymore so you will not see them.